

Source: tensorflow.org
Model creation is definitely an important part of AI applications but it is very important to also know what after training. I will be showing how you could serve TensorFlow models over HTTP and HTTPS and do things like model versioning or model server maintenance easily with TF Model Server. You will also see the steps required for this and the process you should follow. We will also take a look at Kubernetes and GKE to autoscale your deployments.
All the code used for the demos in this blog post and some additional examples are available at this GitHub repo- Rishit-dagli/GDG-Ahmedabad-2020 My session at Google Developers Group Ahmedabad about Deploying models to production with TensorFlow model server, 30…github.com
I also delivered a talk about this at GDG (Google Developers Group) Ahmedabad, find the recorded version here-
The slide deck for the same is available here- bit.ly/tf-server-deck
I expect that you have worked with some Deep Learning models and made a few models yourself, it could be with Keras too.
Motivation behind a process for deployment
 Source: me.me
This is a very accurate representation of the ideal scenario, your model works well or does a good job in the testing or development set and when you bring it out in the real world or production that is when problems start coming and things start failing. You further need to ensure your model is up and running all the time and your users have an easy way to interact with the model. It should also work well on all platforms be it web, Android, IoS, or embedded systems. You would need to have a resilient pipeline to serve your model and an efficient way to pass data. These are just a few differences between production and development.
What things to take care of?
- Package the model
So first you would want to get the model and package it in a way that you can use it in a production environment. You ideally would not put a Jupyter notebook in the same format into production, you can if you wanted to but it is generally not advised to do so.
- Post the model on Cloud Hosted Server
Then you would want to host your model on some cloud-hosted server so you can serve your users, provide them the model whenever they need the model.
- Maintain the server
Now that you have posted your model on a cloud-hosted server you also need to maintain it. One of the main things which I refer to while saying you need to maintain the server is autoscaling. You should be able to handle your users if you experience an increase in number in your users maybe by increasing your resources.
 A Diagram showing process of autoscaling
- Global availability
Another thing you now want to ensure is that you have a global availability for your models. This also means that your users in a particular region should not face a high amount of latency.
- API
After this you also need to provide a way for your model to interact with your devices, most probably you would provide an API to work with. This API can then be called by you in or maybe someone could call your model and get the predictions back. And you have another thing to maintain and keep running now an API.
- Model Versioning
So tomorrow when you or your team make an update to model, you need to ensure your users get the latest version of your model and we will talk about this in great detail in some time. As an example consider you provide some image classification services you would have to update your models constantly so it can predict with good accuracy the newly available images.
What is TF Model Server?
Now that you know what it takes to actually deploy your models to a cloud-hosted server or serving your models let us see what TF Model server is and more importantly how it can help you in your use case.
TF Serving is a part of TFX or TensorFlow Extended, simply enough TF Extended is an API that is designed to help you to make production-ready, Machine Learning systems. We will only be talking about a specific subpart of TFX called TF serving.
](https://cdn-images-1.medium.com/max/2292/0*BKmXrIJgXEQ7CC2S)
So this is all that you would have to do to create a full-fledged ML solution. What I want you to take a look at is that modeling is not the only part and in fact, is not the major process in creating a deployment. TF Serving helps you do the serving infrastructure part easily.
So maybe you want to run your models on multiple devices, maybe on mobile devices, on low power embedded systems or on the web. Maybe you could use TF Lite to deploy it on mobile devices and embedded systems or create a JavaScript representation of your model and run it directly on the web. Many times it is a better idea to have a centralized model where your devices can send a response, the server would then execute them and send them back to the device that made the call.
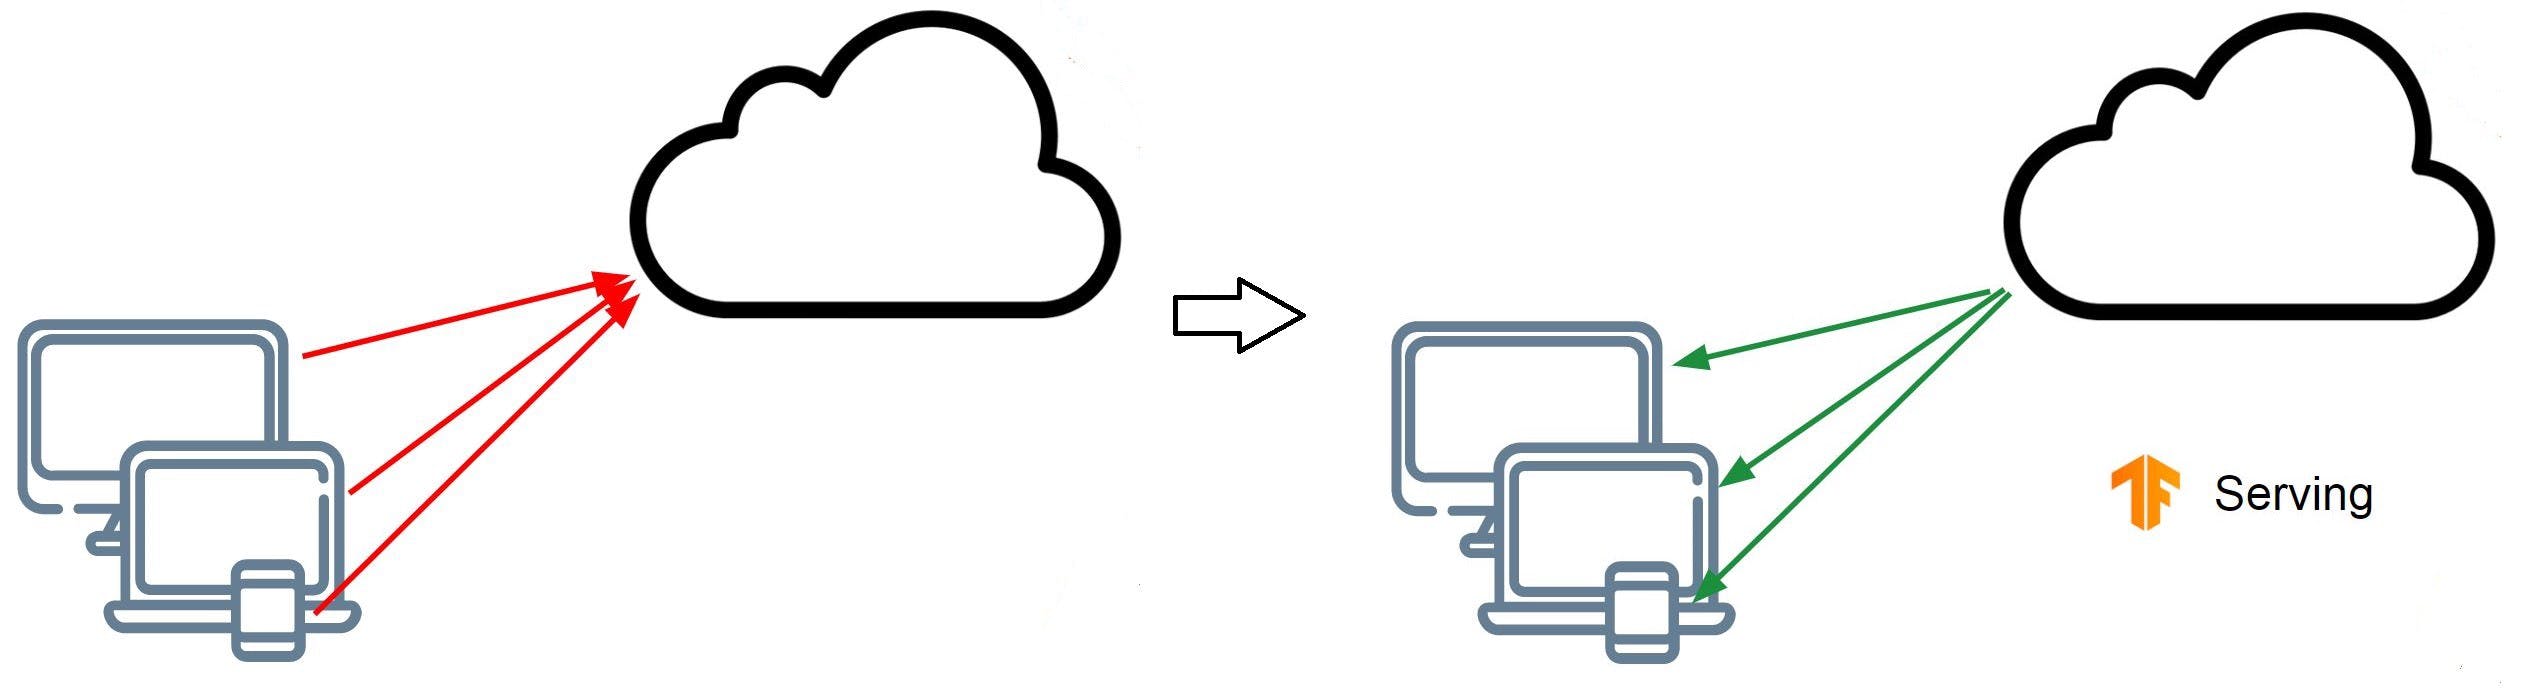 A diagram to show how TF Serving works
Remember we talked about model versioning in an architecture like this you would just need to update your new version of the model at the server and all your devices could instantly have access to it. However, if you used the traditional approach like sending out app updates some users have the new model and some have the old model creating a bad experience. In a cloud-based environment to do so you could use dynamic assignment of resources according to the number of users you have.
TF Serving allows you to do this quite easily so you don’t run into issues like “Oh I just updated my model and my server is down!” and things like that. Let’s see this in practice now.
TF Serving in Practice
- Install TF Serving
So of course before starting you need to install TF Serving. The code examples for this blog in the repo have the installation commands typed out for you. Installing it is pretty straightforward, find installation steps here.
- Converting the model
So, you already have a model and the first thing you would do is simply save it in a format usable by TF Serving. The third line here directory_path shows your model where to save the model and the other two lines just pass the inputs and the outputs-
tf.saved_model.simple_save(

    keras.backend.get_session(),

    directory_path,

    inputs = {'input_image': model.input},

    outputs = {i.name: i for i in model.outputs}

)
If you navigate to the path where you saved this model you would see a directory structure like this, also I made a directory 1which is my model version we will see how TF server helps us manage and deploy these versions. And also note your model is saved in a .pb extension.
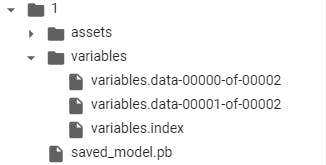 Saved model directory
- Saved Model CLI
There is another great interface called the saved model CLI which I find pretty useful. This gives you a lot of useful information about your saved model like operation signatures and input-output shapes.
!saved_model_cli show --dir [DIR] --all
Here is sample output showing the information this tool provides-
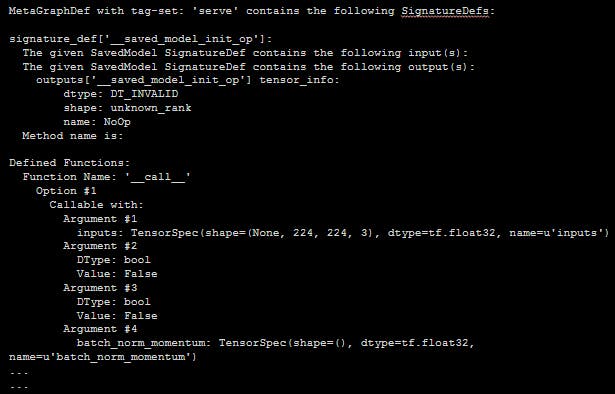 Saved Model CLI Output
- Starting the model server
So here is how you would then start the model server let us break this down-
os.environ["MODEL_DIR"] = MODEL_DIR

%%bash --bg

nohup tensorflow_model_server \

    --rest_api_port = 8501 \

    --model_name = test \

    --model_base_path="${MODEL_DIR}" >server.log 2>&1
So the third line here tells it to use the tensorflow model server, of course you would not include the bash magic cell while implementing it in practice i.e. the code line %bash --bg but as Iassume most of you might use Colab I have added that as Colab doesn’t provide you a direct terminal.
The fourth line here specifies the port on which you want to run the TF Model Server and is pretty straightforward too.
A thing to noteid that the --model_name will also appear in the URL on which you will be serving your models, so if you have multiple models at action managing your serving model URLs also becomes a lot easier.
The last line here specifies that you want to enable logging and sometimes logs are just so helpful while debugging. I have personally used them quite a lot to figure out errors easily.
Performing Inference
Let us now get to the most interesting part which is performing inference over the model.
- Passing in data
A thing to keep in mind while performing inference over the model is that while passing the data in, your data should be lists of lists and not just lists. This is in fact an added advantage for developers. Let us see what this means-
xs = np.array([[case_1], [case_2] ... [case_n]])
Here each of the case_1 , case_2 … case_n has all the values for your features from x1 , x2 … xi .
- Creating a JSON object for the data
data = json.dumps({"signature_name": [SIGNATURE],

                   "instances": xs.tolist()})
If you know a bit about saved models, you might know about SignatureDef, for folks who don’t know it defines the signature of a computation supported in a TensorFlow graph. So you can have support for I/O for a function. You can easily find that by the saved_model_cli . In the instances part we will put in the xs we just created.
- Making an inference request
Now you can simply make an inference request-
json_response = requests.post(
    '[http://localhost:8501/v1/models/test:predict](http://localhost:8501/v1/models/helloworld:predict)',
    data = data,
    headers = headers)
Remember us talking about versions, not the model URL it contains v1 which allows us to easily specify that we want to use version 1 of the model. You can also see the model name test to be reflected in the URL.
Your headers would simply be something like this as you are passing data in as JSON-
headers = {"content-type": "application/json"}
- Images!
A lot of you might feel that it would be interesting to see how you would pass in images. It is in fact very easy to do so. In place of case_1 which we saw above, you would just replace that with a list of values that make your image.
A few added advantages
Now that you know how TF server works and how you could use it. Having known this, here are a few more things it provides. Now you can understand that if let us say you deploy version 2 of your model, in case of any problems your version 1 will still be active and usable.
Also while the time your new model version is being deployed you have no downtime, your older version will continue to work just normal and these things are often quite helpful. TF Model server helps you in doing so very easily.
- Focus on real code
A really wonderful part about TF Model Server is to let you focus on writing real code and not worry about infrastructure and managing it and that is something really useful, you do not want to spend time doing these infrastructure things as a developer. This, in turn, allows you to build better ML applications and get them up and running a lot faster.
Serving the model on Cloud
The things we saw now could be well scaled to the cloud making it even more powerful, you could always have your own server we will not be discussing why Cloud or on-premise here or how load balancing takes place. We will see a brief workflow for deploying the model on cloud with Kubernetes. With TF Model Server this becomes a lot easier.
- Creating a cluster
I will start by assuming you have trained a model and built a docker image for it. The steps to doing this are pretty straightforward and I have also listed them in the GitHub repo for this session. So we will start by creating a Kubernetes cluster with 5 nodes and I will be showing you how you can deploy a simple resnetmodel on the cloud so the name.
gcloud container clusters create

    resnet-serving-cluster

    --num-nodes 5
- Pushing the docker image
docker tag

    $USER/resnet_serving

    gcr.io/[PROJECT_ID]/resnet

docker push

    gcr.io/[PROJECT_ID]/resnet
You can then push your docker image to Container Registry
- Creating the deployment
And with that you are all ready to create a deployment, the YAML file shown here would create the metadata for deployments like your image and the number of replicas you want, I have included a sample for you in the repo.
kubectl create -f [yaml]
Another thing to keep in mind while performing inference with a model hosted on the Cloud you would now use the external IP to make inference requests instead of the localhost we used earlier.
We started out with why it is worth to have a process for deployment. We then saw what is required to deploy your model, versioning, availability, a global nature, infrastructure, and a lot more. We then saw what TF Model server provides us with and why should you choose TF Model server to make deployments. We then saw the process involved with TF Model server. You also saw how it allows you to write real code and not worry about infrastructure, the version wise URLs, and easy management of them. We then moved to see how this could be replicated on the cloud and saw how Kubernetes could make this easy for us.
I have included a few notebooks for you which implement all that you saw in this post, try them out for yourself.
About Me
Hi everyone I am Rishit Dagli
If you want to ask me some questions, report any mistake, suggest improvements, give feedback you are free to do so by emailing me at —