


This blog is equally contributed to by preet parekh. This blog has now also been published on Official Google Cloud Tutorials.
You have probably seen this image below, it's quite popular by the way. And you too might have faced issues like Android Studio is very slow, build takes a lot of time, AVD starts after a long time if you are on a slow machine like mine. So, what we will see now is how we set up a fully functional Android development environment on the cloud and you can too! I will be showing you this with Google Cloud Platform(GCP). You can use the free credits provided by GCP to follow along. When we replicated this system we observed a mind-blowing performance 🤯, the first Gradle Build happening in just over a second and Flutter Builds in 3 seconds or so! Now that is a great speed. You can imagine this as a 15 GB machine that runs only Android studio.
](https://cdn-images-1.medium.com/max/2000/1*CPE74DZjvk1TDfXybCbRoQ.jpeg) Source: devrant.com
Source: devrant.com
Why the simple approach doesn’t work
What you simply might want to do when someone tells you to make an Android development environment on the cloud is-
Spin up a VM
Install some desktop environment in it and connect to your VM
Install Android studio
And get running. But alas this does not work 😞, you will get a recommendation like this while creating the AVD and the AVD won’t start.
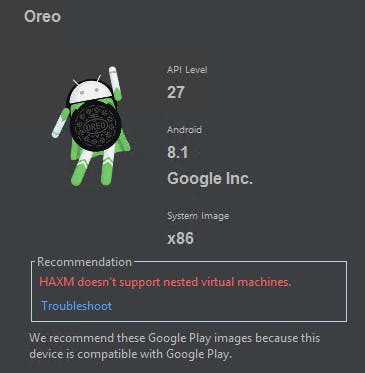 Error with the simple approach
HAXM does not support nested virtual machines
So, GCP or for that matter any other cloud supporter will not provide you the ability to create nested virtual machines by default. It is blocked by default so Android studio would work, you would be able to write code and perform builds but you would not be able to run an AVD. That is not much useful so let’s see how we can solve this problem.
How nested virtualization works?
Compute Engine VMs run on top of physical hardware (the host server) which is referred to as the L0 environment. Within the host server, a pre-installed hypervisor allows a single server to host multiple Compute Engine VMs, which are referenced to as L1 or native VMs on Compute Engine. When you use nested virtualization, you install another hypervisor on top of the L1 guest OS and create nested VMs, referred to as L2 VMs, using the L1 hypervisor. L1 or native Compute Engine VMs that are running a guest hypervisor and nested VMs can also be referred to as host VMs.
 Nested virtualization
In GCP-
Nested virtualization can only be enabled for
L1VMs running on Haswell processors or later. If the default processor for a zone is Sandy Bridge or Ivy Bridge, you can use minimum CPU selection to choose Haswell or later for a particular instance.Nested virtualization is supported only for KVM-based hypervisors running on Linux instances
Windows VMs do not support nested virtualization, only some Windows OSes support it.
Apart from setting this up on a Linux VM and getting the Linux feel, we will also see how to set up a Windows VM as Windows VM require almost no additional setup to get started whereas in a Linux instance it might take you some time to get started. Also, Linux usually uses VNC whereas Windows has developed RDP for remote connection. And it is complicated to have VNC and RDP running on Linux at the same time.
And RDP is undoubtedly better than VNC in performance. But again RDP usually refers to Windows while VNC is universal. You have RDP clients for Linux and MAC so there’s no need to worry. We will see both of these approaches.
For more details of how nested virtualization works and what restrictions exist for nested virtualization, see Enabling nested virtualization for VM instances.
Making a VM for this
These are the OSes that support nested VM in GCP but still, some setup would be required.
 OSes which allow nested VM
We expect you to install gcloud on your system which is the primary CLI tool to create and manage Google Cloud resources. Follow this link to install gcloud.
- Make a boot disk
To make a VM you first of course need to create a boot disk. So let’s do this in gcloud .
gcloud compute disks create disk1
--image-project debian-cloud
--image-family debian-9
--size 100
--zone us-central1-b
You are here making a boot disk called disk1 with a Debian image, change it to Windows Server 2016 if you want to make a Windows Server instance. The size argument here expects the size of the disk in GBs. 100 GB is good enough for me, feel free to change the value according to your requirement. So for a Windows VM use-
gcloud compute disks create disk1
--image-family windows-2016
--image-project gce-uefi-images
--size 100
--zone us-central1-b
- Using the boot disk that you created in Step 1 or a boot disk from an existing instance, create a custom image with the special license key required for virtualization.
gcloud compute images create [name_of_image]
--source-disk disk1
--source-disk-zone us-central1-b
--licenses "https://compute.googleapis.com/compute/v1/projects/vm-options/global/licenses/enable-vmx"
replace [name_of_image] with the name you like. What you are doing here is essentially making an image from the boot disk we created and applying the license necessary to allow it to perform nested virtualization.
After you create the image with the necessary license, you can delete the source disk if you no longer need it.
Create a VM instance using the new custom image with the license created in Step 2. You must create the instance in a zone that supports the Haswell CPU Platform or newer.
gcloud compute instances create [name_of_vm]
--zone us-central1-b
--min-cpu-platform "Intel Haswell"
--image [name_of_image]
--custom-cpu = 4
--custom-memory = 15
Here you simply are creating a VM instance with the image you just created in Step 2.
You can edit custom CPU and memory this is the number of virtual CPUs and the RAM you need. This configuration is good enough to run Android Studio at the speed mentioned at the start of the blog, but feel free to change it.
If you made a Windows instance you are done 😄, you will now just have to test it out, so head on to the “Connecting to VM section”. This is because GCP sets up a connection stream and a good desktop GUI needed for Android Studio only for Windows instances.
Configuring your VM (Only Linux VMs)
What you now need to do is create a desktop environment and make a connection channel so you can connect to your VM with that desktop environment.
- Make a desktop environment
You can use gnome, xfce etc. There are so many options but for this post, I will be using xfce which takes minimal time to download. SSH in your VM instance and enter-
sudo apt-get install lxde
You will be asked with some options, feel free to customize them bur if you simply want to follow along just select “Yes”.
- Connect to VM instance (VNC)
sudo apt-get install tightvncserver
This command installs tightvncserver which will help us establish a VNC connection.
- Set up a firewall rule
Go to VNC network > Firewall rules or alternatively use this link and log in with the same GCP account.
We need to do this as we want to allow vncserver to access port 5901. Choose a name and target tag for it, set allowed protocols to tcp:5901. As an example here is the firewall rule I made. It was named vnc-server and had the target tag as vnc-server .
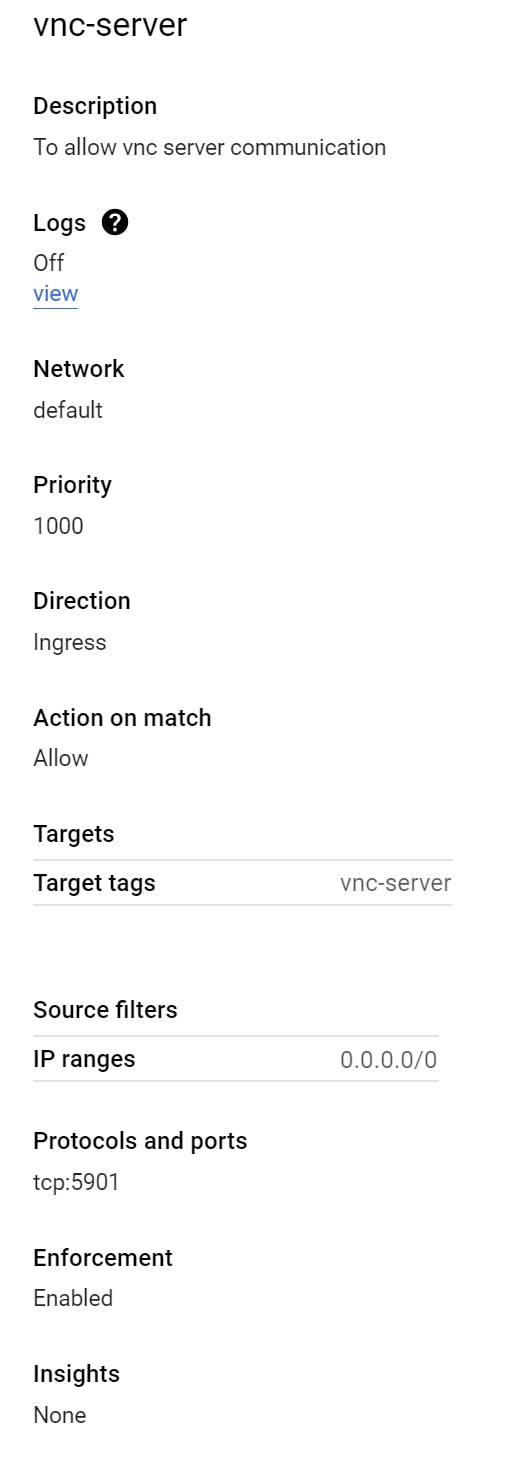 A sample firewall rule
Now go to VM instances page > Select the VM you are using > edit VM > Networking. Add the target tag in the network tag textbox. You might need to stop VM to do this.
- One last step
Navigate to .vnc/xtsrtup and open this in your favorite text editor like vim, nano etc. Add /usr/bin/startlxde at its end. This will tell VNC to render lxde desktop at startup.
You just made a desktop environment on your Linux VM 😃
Connect to VM instance
- Linux
SSH in your VM instance and type
vncserver
This starts a vncserver session. Use a VNC viewer like RealVNC or Tight VNC viewer. Now you will connect to your VM
 A VNC client
Enter the external IP of your VM followed by :5901 to tell it to view port 5901. And you are done with connecting to your VM instance.
- Windows
You first need to make a firewall rule to allow RDP in your instance. Go to VNC network > Firewall. Click create a firewall rule and add tcp:3389 in protocols and ports section, give a name and target tag to the firewall rule. Save it and navigate back to the VM instances page. In the VM instances page > Select the VM you are using > edit VM > Networking add the target tag you just put in while creating the firewall rule.
Your local OS-
Windows — you are ready to connect without any more setup. Open the remote desktop app preinstalled.
Any other OS — install an RDP client like
For MAC — Download the Microsoft Remote Desktop client from the Mac App Store or Cord.
For linux — FreeRDP or Remmina
You are now ready to connect to your VM. In the GCP console click set windows password , make a new account, and save the password somewhere you remember.
Now enter your external IP of VM in your RDP client, it will ask you for username and password enter the credentials you just created and you just connected to your instance!
Finishing Up!
Download Android Studio from the official website from the VM. If you’re on a Windows VM consider installing Chrome first (No internet explorer 😆).
Windows: you are ready to run the AVD and start development 😃
Linux:
You might get a dev\kvm permission deniederror.
- Install
qemu-kvm.
sudo apt install qemu-kvm
- Use the
addusercommand to add your user to thekvmgroup.
sudo adduser <username> kvm
And now you are done you can run an AVD here and do your development with a mind-blowing performance. I would recommend you to change the heap size of your AVD to at least 512 MB for good performance.
 The AVD runs!
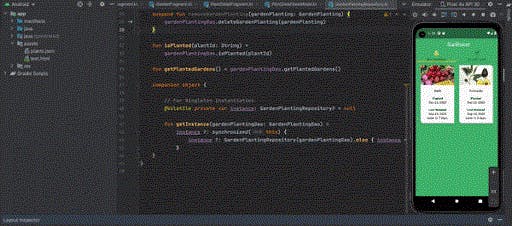
You’re ready to start building with Android Studio. Here’s an indication of the first Gradle build happening in just over a second when the author used this setup:
 The first Gradle build in a little over a second!
If you use a GPU on the VM
If graphics aren’t rendered on the AVD when you are using the GPU, edit your AVD settings to switch the Emulated Performance setting to Software. This allows you to select how graphics are rendered in the emulator:
Hardware — Use your computer graphics card for faster rendering.
Software — Emulate the graphics in software, which is useful if you’re having a problem with rendering in your graphics card.
About Us
- Rishit Dagli
- Preet Parekh
If you want to ask me some questions, report any mistake, suggest improvements, give feedback you are free to do so by emailing me at —